
CLICCA QUI PER LA VERSIONE IN ITALIANO

Topeca is an Italian company with over 50 years of experience in the sector and creator of the first, historic and unbeaten polyurethane foam injection system for ski boots.
Today it presents a new material designed specifically for bootfitters:
Topeca BTF
Applicable to any liner and tongue, regardless of wear.
when new: to customize a standard liner
when used: to give new life to the liner or tongue

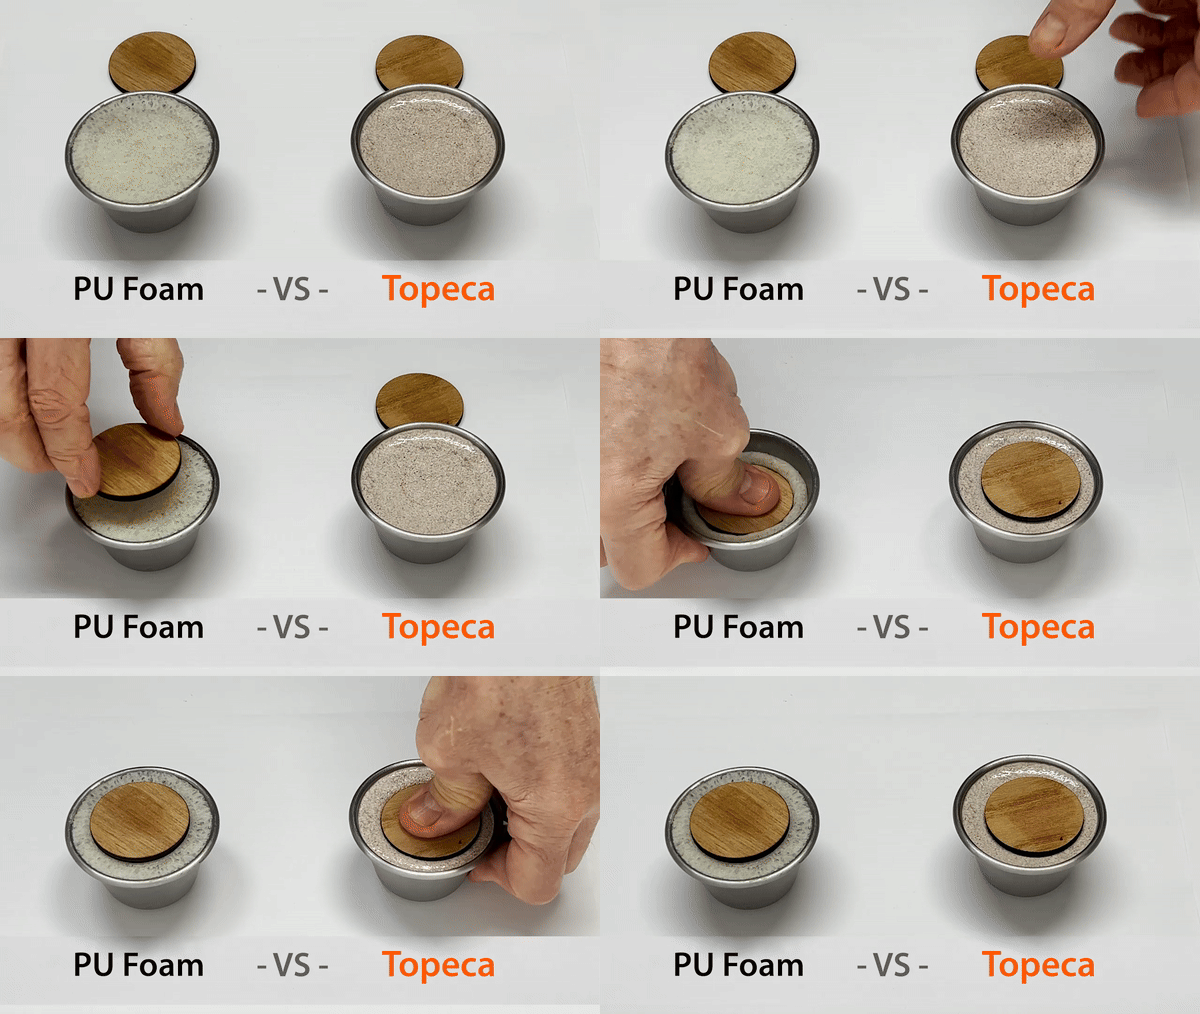
IT IS NOT COMPRESSIBLE
Result:
By distributing pressure evenly, painful spots are eliminated, the foot remains firm, stable and incredibly comfortable, therefore deforming/grinding the shell will only be useful in the most extreme cases.
VERY EASY TO WORK WITH
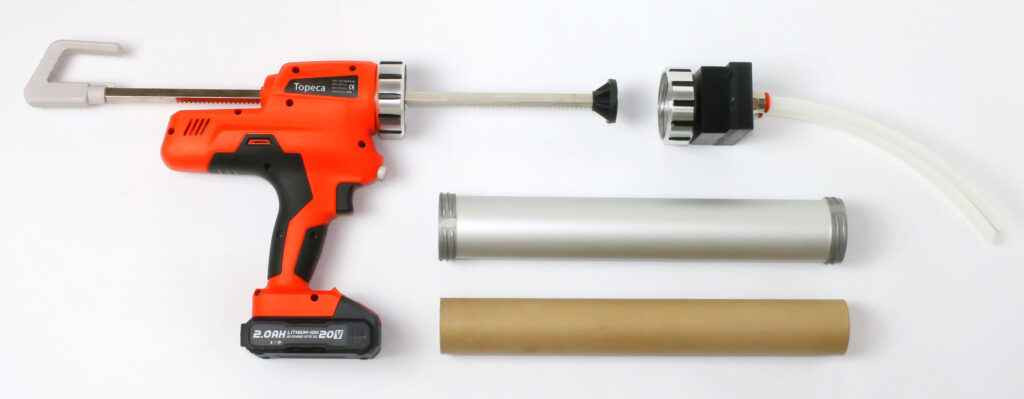
Heat the cartridge and inject.
Any readjustment is done by simply reheating the area.
Other properties
• At room temperature, it is solid but elastic.
• It can be injected into most ski boot liners on the market.
• It is completely non-toxic.
GO DEEPER
Topeca BTF is the ideal partner for those seeking flexibility, innovation and concrete results to customize ski boots, skating boots and more.
The material complies with the new European regulations on the transport and processing of sensitive chemical components.
It is made from natural materials (such as cork and insulating inerts) combined with non-toxic binders.
The liners and tongues compatible
with Topeca BTF are:
– Liners and tongues with traditional foam padding (agglomerated or PU foam)
– Thermo-formed liners and tongues as long as they are made from at least two layers of materials.
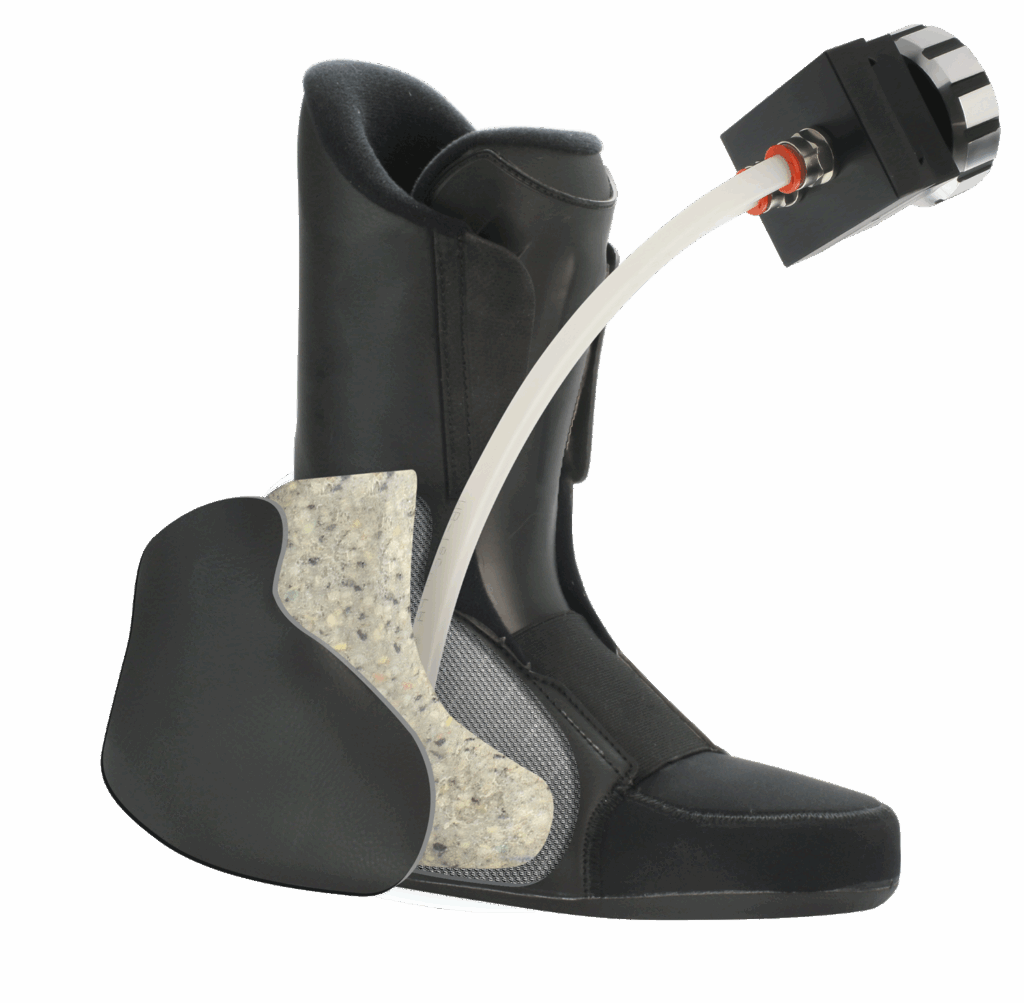
In practice: over 90% of the liners on the market.
Not suitable with:
• Liners made from a single layer
• Traditional injection liners that are completely empty (they would require too much material and therefore increase the weight)
SYSTEMS COMPARED
Foam tradizionale: uses four bottles for each pair (two large, two small), 8 cannulas with their caps and 250–300 grams (8,8-10,5 oz) of residual material in the bottles, for a total of around 500–600 grams (17,6-21 oz) of non-recyclable waste that ends up in general trash.
•••••••• VS ••••••••
Topeca BTF , on the other hand, only produces waste in the form of a fully recyclable cardboard tube and four small plywood and paper disks, about 50–60 grams of non-recyclable material, while any material that is not used can be reused 100% for subsequent injections.
The injection cannulas can also be cleaned and reused. In short, there is no waste.
Traditional foam. Il best before è di 18 mesi dal confezionamento.
•••••••• VS ••••••••
Topeca BTF has no defined limit. For convention we still state a four-year best before date.
Traditional foam foam does not require any special equipment.attrezzature.
•••••••• VS ••••••••
Topeca BTF uses a microwave oven, and it takes about 8 minutes for heating (or a traditional oven, which however needs about 40 minutes to heat up). It also requires a battery-powered dispenser and other small specific tools that we supply.
Traditional foam. It is made of polyol and isocyanate, which is classified as toxic.
•••••••• VS ••••••••
Topeca BTF: No toxicity.
Traditional foam. Once it has reacted, it can no longer be modified.
•••••••• VS ••••••••
Topeca BTF changes state depending on temperature: below 50 °C (122 °F) it keeps its shape, above 60 °C (176 °F) it becomes malleable and at 110 °C (230 °F) it is liquid. It is always possible to add or remove material if you need to make adjustments later.
Often it is not necessary to deform the shell: by filling the empty spaces in the liner, the pressure is distributed evenly and many pressure points disappear.
TUTORIAL
LINER INJECTION
ALL COMPONENTS (SHELL, LINERS, TONGUES, DIVERTER, CANNULAS) MUST BE AT ROOM TEMPERATURE, NEVER COLD
Important: never inject both liners at the same time: the injection must be smooth, without pauses, before the material cools.
- To avoid wasting time, we recommend immediately placing the Topeca BTF
injection kit (cartridge) in the microwave, set to 1,000 watts for 8 minutes, resting it on the dedicated stand with the hole facing up. After 5 minutes, check the temperature of the material and adjust accordingly.
In the meantime, proceed with preparing the liner
- Position the label with the cutting mark just above and in front of the malleolus. With the liner on the foot, position the cannula at the cutting mark and press. If the point is painful it will be impossible to close the boot, so you need to move the label even further forward, beyond the malleolus.
- With a sharp blade, cut exactly along the mark.
- Using the specific tool, detach the liner fabric from the padding in the area you intend to fill with material.
Possible issues: under normal conditions the detachment occurs without difficulty, but in some liner models there are layers of double-sided glued foam that seem impossible to separate.
No problem: in the kit there is a “screwdriver” that is hollow along its entire length, allowing you to introduce a few drops of nitro thinner exactly at the critical point. This greatly facilitates the separation of the lining fabric from the padding.
- Insert the injection cannulas after cleaning off any residual material from the previous injection. Insertion should require a certain amount of pressure so as not to leave gaps where the material could leak out.
- Once the boot is on, check that the cannulas are correctly positioned, facing toward the toes and inserted at least 4–5 cm (1,5-1,9 in).
- Clean the diverter. If the right/left movement is difficult, apply a few drops of nitro thinner. Then connect the diverter to the cannulas.
- Buckle the boot.
Note: if the boot is left too open, too much material will accumulate and the fit will end up too tight. The boot must therefore be closed in a “normal” way. - Using suitable gloves, remove the cartridge from the microwave and check the temperature and fluidity of the material. At 110 °C (230 °F) the material is fluid and injectable.
Note: Topeca BTF is a highly insulating material, so the heat release is gradual and perfectly tolerable for the foot. In case of feet with a very tight Achilles tendon, a large accumulation of material may cause some discomfort. In this case, simply blow in a bit of compressed air.
N.B.: The dispenser must be set to medium speed.
- Insert the cartridge into the dispenser, screw on the diverter, manually push the rack rod forward and start the injection.
The injection starts on the inside of the foot: in the first few seconds the material must fill the cannulas and then you count to three. Without stopping the injection, move the diverter to the other side and again count to three once the cannula has filled. Continue alternating inside/outside.
NOTE: the injection must be continuous, without releasing the trigger, because the dispenser, at every interruption, moves slightly backward and this would slow the flow too much.
- At this point, the customer’s cooperation becomes essential: they must indicate where they want more material. From that spot you will count to four on that side, and when the material has reached the midpoint of the foot you stop. Stop.
Too much material on one side of the foot? Immediately remove the corresponding cannula so that the still warm and viscous material can flow back out of the opening. Cleaning will then be easy.
Missing a bit of material? No problem: “clean” the corresponding cannula by pushing the material into the liner with the supplied tool. You can also use the content of other cannulas that have yet to be cleaned, pushing it into the desired area (it will then be reheated to complete the adjustment).
Wait about ten minutes for Topeca BTF to solidify.
To speed up cooling, blow compressed air between the foot and the liner
Any material that has leaked out can be cleaned easily. If necessary, use nitro thinner.
TONGUE INJECTION
ALL COMPONENTS (SHELL, LINERS, TONGUES, DIVERTER, CANNULAS) MUST BE AT ROOM TEMPERATURE, NEVER COLD
Heating must be carried out following the same procedure described for the liners.
In the meantime, prepare the tongues.
1- Choose the most suitable point for inserting the injection cannula, usually in the upper part of the tongue, free of inserts or reinforcements.
2- Glue the cutting label and, at the end of the mark, fix two large staples (not office staples) spaced about 3–4 mm (0,15-0,19 in) outward. Cut the seam between the two staples.
3- Insert the cannula into the tongue.
4- After checking the temperature (around 110 °C / 230 °F) and inserting the cartridge into the dispenser, connect a single cannula to the diverter plug-in and inject the material. Stop when it starts to enter the tongue.
5- Position the indicator on the rack in line with the quantity shown on the “grammometro” and place a second indicator for the same quantity destined for the second tongue.
6- Continue injecting until you reach the first indicator.
7- Disconnect the first tongue, insert the cannula into the second tongue and inject Topeca BTF up to the second indicator.
8- Close the opening between the two staples with an additional staple.
9- Put the boot on and tighten the buckles well until the material has completely cooled.
10- Once cooled, clean, check the staples and, if necessary, remove them and finish with stitching.
MATERIAL RECOVERY
The leftover material in the cartridge can be used for a new liner.
IMPORTANT: since the material tends to expand with heat, you must close the outlet hole with the dedicated plastic plug and place the cartridge in the oven with the plug facing upward.
Proceed from step 09 (injection).
If the quantity is not enough for another liner, the material can be used to inject a tongue. If it is not even enough for the tongue, discharge it into a new empty tube supplied in the kit. In this tube you should also place the small quantities (as long as they are clean and free of foreign materials) that leaked out during injection.
Once full, heat the tube in the microwave to compact the material. If necessary, add more material until you fill the cartridge, leaving about 4 cm (1,5 in) from the edge. Close the bottom with the dedicated disk, fixing it with cyanoacrylate glue, and then use it as a new cartridge.